An approach of media management at home

What I wanted is two find the best way to have minimal management regarding my series, movies, and TV streams. Even if I have a Netflix account I still need this kind of solutions because sometimes I watch old series, provider specific series (BBC, OCS…). Even with subscriptions having a centralized solution that can be streamed on mobile, computers, TV at home and outside is very convenient
Architecture I choose
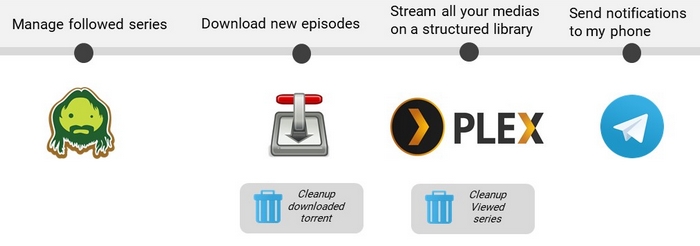
I wanted to use Sickchill as a tvshows manager. The usecase is when I want to watch a new show I simply add it to sickchill interface. Sickchill is able throw Transmission to download the bittorent video file with my selected language subtitle. When a download is complete, it is added to Plex library as a new tv show sorted by season with all metadata related with the show. When series downloads are started,finished I’m warned on my phone by a Telegram bot with a notification
Your hardware needs
- A middle range computer as server (I choose a MacMini late 2014, with 4GB of RAM, an intel i5 and a 512GB SSD) able to steam 4K and encode 1080p videos with Plex

(Optionnal)
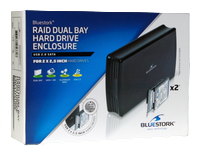
- 2,5” BLUESTORK Dual Bay SATA Raid a valuable and small dualbay to store my shows database
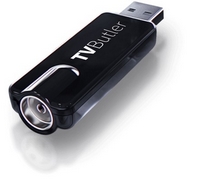
- A tuner TV ; I choose a DVBLogic/TVMosaic TVButler 100TC folowing Plex supported tuner and macOS compatibilities
Install the series and subtitle manager : SickChill
Why sickchill ?
-
Sickbeard is the original pyhton based project but started to be deprecated, torrent providers are old, subtitles are not supported, the mobile app is no more updated (5 years) and the web app is not responsive.
-
Sickrage have lots of broken update that need to tweak a lot and regulary also the authentication mecanism is now on the cloud on sickrage platform which is completely useless.
-
Sickchill seems to be a great fork of Sickbeard (in 2019) regulary updated, supporting subtitles and … stable !
Installation of SickChill (macOS)
Let’s start with the central piece of the media management architecture. SickChill is an automatic Video Library Manager for TV Shows. It watches for new episodes of your favorite shows, and when they are posted it does its magic: automatic torrent/nzb searching, downloading, and processing at the qualities you want.

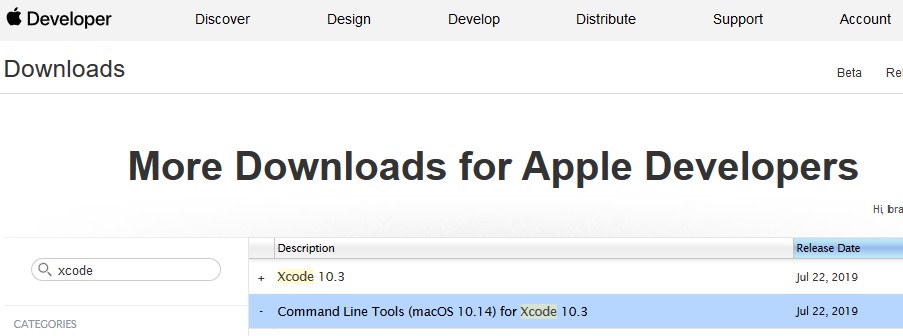
Install xcode-select : macos build tools
by command line :
xcode-select --install
or with a package (with an apple developer account)
Install pip : pyhton package manager
curl https://bootstrap.pypa.io/get-pip.py -o get-pip.py
python get-pip.py
Clone Sickchill repository
git clone https://github.com/SickChill/SickChill.git
Install python dependencies for Sickchill
pip install -r /opt/sickrage/requirements.txt
Try a firstlaunch
pip install -r /opt/sickrage/requirements.txt
Install macOS LaunchAgent plist config to launch Sickchill at startup
user:~/Library/LaunchAgents$touch com.sickchill.agent.plist
<?xml version="1.0" encoding="UTF-8"?>
<!DOCTYPE plist PUBLIC "-//Apple//DTD PLIST 1.0//EN"
"http://www.apple.com/DTDs/PropertyList-1.0.dtd">
<plist version="1.0">
<dict>
 <key>Label</key>
    <string>com.sickchill.agent</string>
        <key>Disabled</key>
        <false/>
        <key>EnvironmentVariables</key>
        <dict>
                <key>PATH</key>
                <string>/usr/local/bin:/usr/bin:/bin:/usr/sbin:/sbin</string>
        </dict>
        <key>KeepAlive</key>
        <true/>
        <key>ProcessType</key>
        <string>Interactive</string>
        <key>ProgramArguments</key>
        <array>
                <string>/usr/local/bin/python2.7</string>
                <string>/Applications/SickChill/SickBeard.py</string>
                <string>--nolaunch</string>
        </array>
        <key>RunAtLoad</key>
        <true/>
<key>UserName</key>
 <string>homeserver</string>
</dict>
</plist>
Start the daemon at startup
launchctl load ~/Library/LaunchAgents/com.sickchill.agent.plist
You can now open it on your browser
http://yourlocalIP:8081/

Install transmission daemon

Transmission is a torrent client bringing you the ability to download with bittorent protocol On this article, it is used by sickchill to download your series
Install package manager for macOS Brew
/usr/bin/ruby -e "$(curl -fsSL https://raw.githubusercontent.com/Homebrew/install/master/install)"
Install transmission with brew
brew install transmission
Start the daemon
launchctl load ~/Library/LaunchAgents/
Configure transmission
nano /usr/local/var/transmission/settings.json
Secure it a little bit : https + password
rpc-authentication-required: Boolean (default = false)rpc-password: String
**NB: for more information regarding transmission daemon customization your can go here
Auto stop seed when download finished to be able to delete downloaded shows
idle-seeding-limit: Number (default = 30) Stop seeding after being idle for N minutes.idle-seeding-limit-enabled: Boolean (default = false)
You need to have different path for download and incomplete directory (required for Plex)
download-dir: String (default = default locations)incomplete-dir: String (default = default locations) Directory to keep files in until torrent is complete.incomplete-dir-enabled: Boolean (default = false) When enabled, new torrents will download the files to incomplete-dir. When complete, the files will be moved to download-dir.start-added-torrents: Boolean (default = true) Start torrents as soon as they are added.trash-original-torrent-files: Boolean (default = false) Delete torrents added from the watch directory.
Download banned ip filter list to prevent corrupt or spam torrent download
you can find your blocklist (here)[https://www.iblocklist.com/lists] or (here)[http://john.bitsurge.net/public/biglist.p2p.gz]
{
    "blocklist-url": "http://www.example.com/blocklist",
    "blocklist-enabled" : true,
}
Enable a script to auto clean torrents each days
Cleanup your transmission torrent client automatically when torrent is done,seeded…
transmission-cleanup-script.sh
  #!/bin/sh

  TORRENTLIST_COMPLETE=`/usr/local/bin/transmission-remote  -n <login>:<password> -l | grep 100 | grep "Stopped\|Finished\|Idle" | cut -c 1-5 -c 71-`

  for TORRENT_COMPLETE in $TORRENTLIST_COMPLETE
  do
    echo "Removing torrent ID# $TORRENT_COMPLETE"
    TORRENT_ID=`echo $TORRENT_COMPLETE | awk '{ print $1 }'`
    /usr/local/bin/transmission-remote -n <login>:<password> -t $TORRENT_ID -r
  done
NB: Precise your transmission credentials on the script if needed
Usage with a CronTab
CronTab set
crontab -e
0 0 * * * /bin/sh /usr/local/var/transmission/cleanup.sh
Enable torrent downloader on Sickchill
Great 👍 ! Now you have a silent torrent client ready to be linked with Sickchill
-
Simply you go to settings > search settings > torrent search
-
and add you IP and PORT (defaut is 9091) of your transmission client and eventually your login password if you precice rpc credentials and finally your download location for the torrent (the same you precise on transmission configuration)

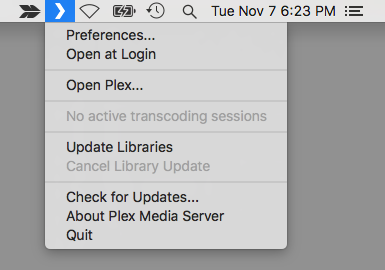
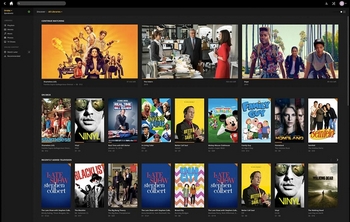
Install a mediacenter : Plex

Plex brings together all the media that matters to you. Enjoy a growing catalog of shows, news, and podcasts. It’s possible to enjoy all the media you like in a single app, on any device, no matter where you are.
Why plex (vs Kodi) ?
Plex user experience is to my mind the best one you can have with actual solutions especially when you want multiple devices (TV, phone, PC…) synchronisation including encoding for bad network bandwith, auto-download metadata for your shows. You will have very few configuration and updates are very easy. I also like the ability to have a built-in tuner TV feed (you need to buy a ‘plex pass’ for that)
Starting configuration
Plex installation is very easy and you have plenty of documentation on the website.
When the instalation is done your are now able to access plex throw your browser at
http://yourlocalIP:32400/web
Manage cleanup of your viewed series to avoid diskfull
- You have limited space on your server disk ? and you don’t want to keep shows that you just consume ? Plex-cleaner is clearly what you need
configure plex-cleaner script
- A simple json configuration file helps you to manage rules regarding you tv shows cache (shows exclusions, max episodes …)
{
  "test": true,
  "Host": "127.0.0.1",
  "Port": "32400",
  "SectionList": [],
  "IgnoreSections": [],
  "LogFile": "",
  "LogFileMode": "",
  "trigger_rescan": false,
  "EmailLog": false,
  ...

  ],
  "ShowPreferences": {
    "Show 1": {
      "onDeck": true,
      "maxDays": 30,
    ...
add it to a cron to regularly use it
crontab -e
0 0 1 * *  python /Users/homeserver/.plexcleaner/PlexCleaner.py
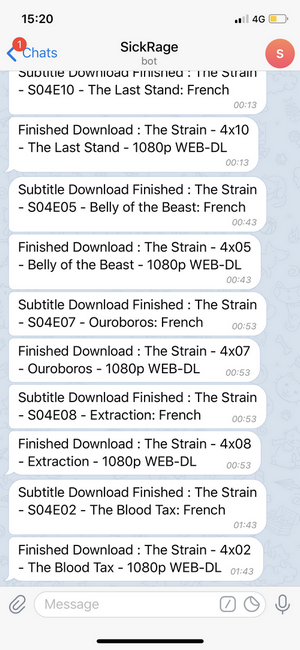
Notification over telegram
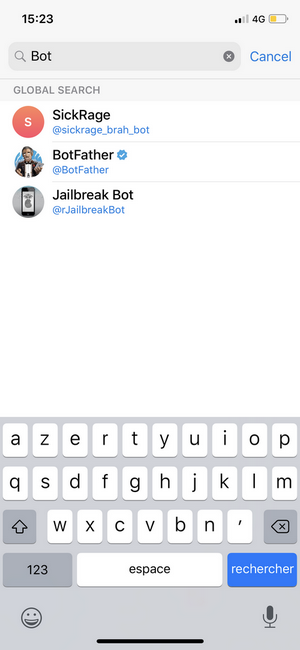
Download Telegram App on you phone
On the search filed in contact tab, search for the bot BotFather
Type the command to start the bot
/start
Create a bot
/newbot
Folowing instructions on the conversation choose a name and username and you will generate you bot HTTP API key.
Add to sickbeard settings telegram notification
In Settings > Notifications > Devices > Telegram field, fill the username and API keys you’ve just created and thats it ! Now you have notifications on your phone regarding TV downloads
Administration outside my home
To avoid to much security leaks, I decided to choose the VPN L2TP approach by adding VPN server capabilities to my macOS Mojave computer. So by simply add it to the built in ios VPN support I can be at home on my phone and so manage my sickbeard, transmission & plex instances
I mostly inspired my instructions from jonsview.com blog post. Thanks to him !
Setup your router port forwarding to redirect trafic to your VPN server
| UDP | 500 | ISAKMP/IKE |
| UDP | 1701 | L2TP |
| UDP | 4500 | IPsec NAT Traversal |
| TCP (Optional) | 1723 | PPTP |
Replace /usr/sbin/racoon with a version from Mountain Lion
In OS X Mavericks, there was a change to the /usr/sbin/racoon program which breaks L2TP access from remote clients when traversing NAT. This is a known bug and I have filed a bug report with Apple.
Replace /usr/sbin/racoon with a version from Mountain Lion. If you don’t have your own backup available, you can download my backup of racoon from Mountain Lion. Simply unzip, move the executable into /usr/sbin, and reboot your Mac [or kill and restart racoon].
sudo mv /usr/sbin/racoon ~/Desktop/racoon.bak
sudo mv ~/Downloads/racoon /usr/sbin/racoon
sudo killall racoon
Add a shared secret to your keychain
Library/Preferences/SystemConfiguration/com.apple.RemoteAccessServers.plist
You need to modify the following lines with your own information:
- Lines 19-20 under “OfferedServerAddresses”

    These two lines should be changed to the DNS domains you want your VPN clients to use. In this example, I’m providing my local router (10.0.1.1) and a Google DNS domain as a secondary (8.8.4.4).

- Lines 29-30 under “DestAddressRanges”

    These two lines specify the start and end IP address range that will be given to clients when they login. In this example, my clients are given an IP address between 10.0.1.250 and 10.0.1.254. Ideally, you should choose a range that is outside of the range that your router will assign so that you avoid IP address conflicts. For example, my router is configured with a DHCP range of 10.0.1.2 to 10.0.249.
This configuration file also enables PPTP in addition to L2TP. If you wish to enable this as well, modify lines 84-85 and 94-95.
<?xml version="1.0" encoding="UTF-8"?>
<!DOCTYPE plist PUBLIC "-//Apple//DTD PLIST 1.0//EN"
"http://www.apple.com/DTDs/PropertyList-1.0.dtd">
<plist version="1.0">
<dict>
	<key>ActiveServers</key>
	...
			<key>Interface</key>
			<dict>
				<key>SubType</key>
				<string>L2TP</string>
				<key>Type</key>
				<string>PPP</string>
			</dict>
			<key>L2TP</key>
			<dict>
				<key>IPSecSharedSecret</key>
				<string>com.apple.ppp.l2tp</string>
				<key>IPSecSharedSecretEncryption</key>
				<string>Keychain</string>
				<key>Transport</key>
				<string>IPSec</string>
			</dict>
		...
		</dict>
	</dict>
</dict>
</plist>
Create a Launchd profile
Take the com.apple.ppp.l2tp.plist plist configuration file below and save it to the following location /Library/LaunchDaemons/. Set ownership to root:wheel and chmod 644.
com.apple.ppp.l2tp.plist
 <?xml version=”1.0″ encoding=”UTF-8″?>
<!DOCTYPE plist PUBLIC “-//Apple//DTD PLIST 1.0//EN”
“http://www.apple.com/DTDs/PropertyList-1.0.dtd“>
<plist version=”1.0″>
    <dict>
        <key>Label</key>
        <string>com.apple.ppp.l2tp</string>
        <key>ProgramArguments</key>
        <array>
            <string>/usr/sbin/vpnd</string>
            <string>-x</string>
            <string>-i</string>
            <string>com.apple.ppp.l2tp</string>
        </array>
        <key>OnDemand</key>
        <false/>
    </dict>
</plist>
Launch the configuration
This command will load the launchd configuration and start the vpnd service. The VPN service will automatically start when you reboot your computer.
sudo launchctl load -w /Library/LaunchDaemons/com.apple.ppp.l2tp.plist
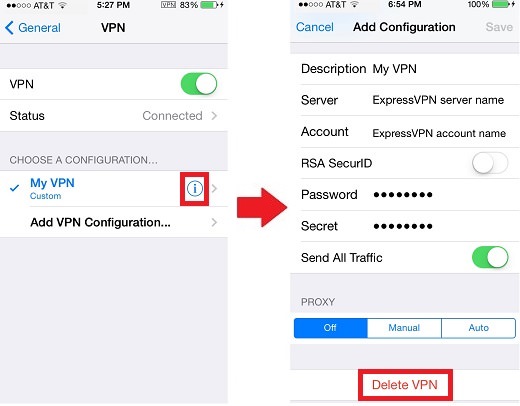
You just now need to configure your VPN on your android or iOS phone and you’re done. You are now able to access to SickChill, Transmission & Plex server everywhere !
Conclusion
Now your media management platform is running, you can find below a summary of all running services on your server. You can now use Sickchill to add TV shows you want , install plex on your TV / phone and wait for notifications on Telegram to start watching your latest prefered shows episodes 🍿
| Transmission | 9091 |
| Sickchill | 8081 |
| Plex | 32400 |
| VPN (L2TP) | 1701 |
That’s all for today !
The project can be forked here